


An altar is a dedicated surface where you focus your spiritual or magical practice, and you can build one right now with four things: a light source, a meaningful anchor object, something to cleanse the space, and a small bowl for water. Find a low traffic spot, set those items down with intention, and you have a working altar. Everything else is refinement.
TL;DR:
- A beginner altar can be built quickly with four items: a light source, an anchor object, a cleanser, and a small water vessel, placed with intention.
- The most effective location is a private, low-traffic spot that you can access easily, avoiding inaccessible or rarely visited spaces.
- Starting with simple objects that represent the four elements—fire, water, air, earth—enables expansion without clutter, emphasizing meaning over quantity.
- Daily routines involving lighting, breathing, and reaffirming your intention reinforce the altar’s purpose and maintain its active use.
- Proper cleansing through smoke, sound, or moonlight ensures energetic clarity, with respect for cultural origins of specific cleansing tools like sage and palo santo.
Table of Contents
- What Is an Altar, and Why Does Intention Matter?
- Where Should You Put Your Altar?
- What Are the Core Starter Items for a Beginner Altar?
- How Do You Arrange and Consecrate Your Altar?
- How Should You Cleanse and Consecrate the Space?
- What Does a Daily and Monthly Altar Routine Look Like?
- What Should You Add Later, and How Do You Stay Safe?
- How Does Kejiwa Approach Starter Altars?
- How Do You Adapt Altar Setup Across Different Spiritual Paths?
- What Mistakes Do Beginners Actually Make?
- Want a Curated Starting Point Instead of Building One From Scratch?
- Where Can You Learn More About Setting Up an Altar?
- Sources
What Is an Altar, and Why Does Intention Matter?
An altar is a dedicated focal point for your practice, not a decorative shelf. The difference matters: a bookshelf holds objects because they look nice together, while an altar holds objects because each one serves your intention.
That intention comes first, before you buy a single crystal or candle. Are you working toward calm, clarity, protection, or connection with someone who has passed? Choosing a single guiding intention determines everything that follows, from which objects earn a spot to how often you tend the space.
Altars take different shapes depending on that purpose. A meditation altar might hold nothing but a candle and a cushion. A devotional altar centers on a specific figure or deity. An ancestor altar holds photographs and offerings. A seasonal altar shifts with the turning year, swapping herbs and colors as the months change. None of these types is more “correct” than another. The right one is whichever matches what you actually need right now.
Where Should You Put Your Altar?
Location decides whether your altar becomes a daily practice or a dust collector. Privacy matters more than tradition here. A bedroom corner, a closet shelf, or a windowsill in a room you actually use beats a formal “sacred room” you rarely enter. If you share your home, pick a spot with low foot traffic so the space feels undisturbed, but keep it visible enough that you remember it exists. An altar tucked behind a door you never open will not get used.
Surface choice is flexible. A small wooden tray works on a bedside table if you have no dedicated furniture. A single shelf, a windowsill, or even the top of a dresser all function fine. If space is tight, a tray-based altar has the advantage of being portable, so you can tuck it away and bring it back out without disturbing the arrangement underneath.
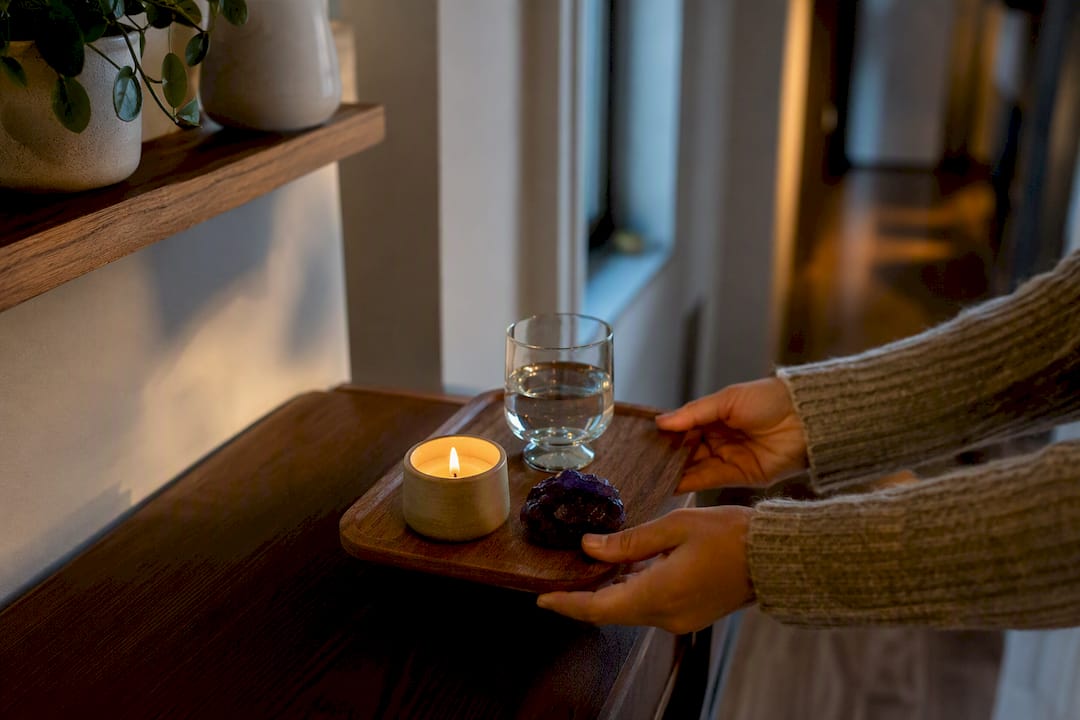
Direction and orientation carry weight in some traditions, facing east for sunrise energy, for example, but for a beginner, accessibility beats symbolism every time. An altar you can reach in three steps gets visited daily. One that requires rearranging furniture gets forgotten by week two.
What Are the Core Starter Items for a Beginner Altar?
You do not need a cabinet full of supplies to start. Multiple beginner guides converge on the same four item minimum, and that convergence is worth trusting.
- Light: a candle or an LED candle if open flame is not practical
- Anchor: a stone, crystal, or photograph that represents your intention
- Cleanser: incense, a small bell, or a piece of selenite to clear stagnant energy
- Vessel: a small bowl of water, representing the emotional or intuitive element
If you want a slightly richer structure without overcomplicating things, the four elements framework gives you an easy expansion path. Representing fire, water, air, and earth is a common and genuinely useful starting point, though it stays entirely optional. Fire shows up as your candle. Water sits in your bowl. Air can be incense smoke or a feather. Earth might be a stone, a small potted plant, or a pinch of salt.
None of this needs to cost much. A juice glass works as a water vessel. A stone from your yard works as an anchor if it holds meaning for you. Where budget matters most is sourcing herbs and crystals ethically. Wild harvested botanicals and sustainably mined stones cost more up front, but they avoid supporting extraction practices that strip land or exploit labor. Buy fewer items and buy them well, rather than filling your altar with anything cheap and available.
Pro Tip: Pair one crystal with one plant or herb per intention. Two objects pointing at the same goal read as focused. Five objects pointing in five directions read as clutter, even if each one is meaningful on its own.
How Do You Arrange and Consecrate Your Altar?
Arrangement follows a simple logic: clean surface first, then a base layer, then your center, then supporting pieces with room to breathe.
- Wipe down the surface and lay a cloth if you want a defined base layer.
- Place your anchor object at the center. This is the visual and energetic focal point.
- Set your light source near the anchor, close enough to feel connected to it.
- Add your vessel and cleanser on either side, leaving visible space between objects.
- Step back and check that nothing crowds the center. If it looks busy, remove one item.
Symmetry is not required. Some practitioners prefer a balanced, mirror-image layout because it feels calm and ordered. Others prefer an organic, asymmetrical arrangement that mirrors how nature actually grows. Either works, as long as the altar has one clear center your eye lands on first.
Once the layout is set, a short consecration turns “objects on a shelf” into “an altar.” Light your candle, place your hands lightly above the surface, and speak a simple line out loud or in your head: “This space is dedicated to [your intention]. I ask for clarity and focus here.” Close your eyes for ten seconds, then open them. That is the entire ritual. It takes under a minute and it is what separates a decorated corner from a working altar.
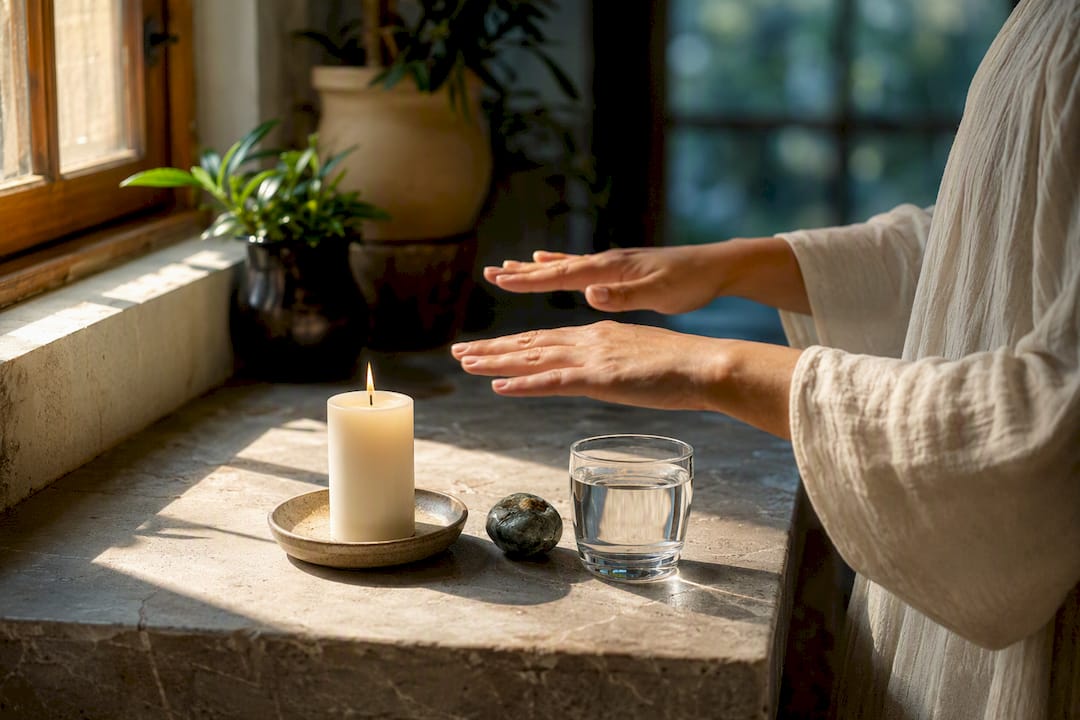
Pro Tip: Say your dedication out loud, even in a whisper. Speaking an intention engages a different part of your attention than just thinking it, and beginners report the altar feels more “real” once it has been spoken to.
How Should You Cleanse and Consecrate the Space?
Clearing a space happens on two levels: physical and energetic, and both matter. Physical cleaning is straightforward. Dust the surface, wipe away wax drips, replace wilted offerings. Skipping this step and going straight to energetic cleansing is like spraying air freshener over an unwashed room.
Energetic clearing has several common methods:
- Smudging with sage or palo santo, moved in slow circles above the surface
- Sound clearing with a bell, singing bowl, or even clapping
- Moonlight, leaving items out overnight under a full moon
- A short spoken dedication, naming the space as sacred and stating your intention aloud
If smoke is not an option, sound and moonlight work as smoke-free alternatives that suit shared housing, smoke detectors, or personal sensitivity to smoke. Either method gives your altar the same psychological reset that smudging does.
One note on respect: sage and palo santo carry specific cultural and ceremonial weight in Indigenous practices. If you use them, learn where they come from and buy from sources that credit and compensate the communities who use them ceremonially, rather than treating them as a generic aesthetic choice.
What Does a Daily and Monthly Altar Routine Look Like?
An altar that never gets tended becomes furniture. The fix is not more elaborate ritual, it is a routine small enough that you actually keep it. A short daily practice consistently outperforms an occasional elaborate one for building lasting habit, and the sequence below takes about three minutes.
- Light: light your candle or switch on your LED.
- Breathe: take three slow breaths, letting your shoulders drop.
- Intention: silently or aloud, restate what this altar is for.
- Close: blow out the candle (or switch off the LED) and step away.
Beyond that daily minute, a weekly and monthly cadence keeps the space from stalling. Weekly, dust the surface, refresh the water in your vessel, and swap out any offerings that have gone stale or wilted. Monthly, clear everything off, clean the surface fully, re-cleanse it with your chosen method, and decide whether any object still belongs. Objects that no longer match your intention get rotated out or retired entirely. Treating this cadence like a hygiene habit, something you just do, matters more than treating it like a special occasion.
What Should You Add Later, and How Do You Stay Safe?
Once your four item base feels steady, expansion comes naturally. Crystals, ancestor photographs, dried herbs, tarot decks, and seasonal items (a pressed leaf in autumn, a shell in summer) all layer in well once you know what your altar is actually for. Add one thing at a time and give it a week before adding another. That pace keeps the altar legible instead of cluttered.
Safety deserves real attention here, not an afterthought. Use stable, weighted candle holders, keep flames away from fabric, hair, and hanging decor, and switch to LED candles entirely if you have curious pets or small children in the house. On sourcing, buy herbs and culturally specific items (palo santo, certain feathers, ceremonial tobacco) from vendors who name their origin and harvesting practices, not from anonymous bulk listings.
How Does Kejiwa Approach Starter Altars?
Some artisans create aromatic mists, spagyric tinctures, and Ormus minerals with altar use in mind from the start, not as an afterthought. A small botanical mist works as your cleanser. A tincture bottle or Ormus jar can serve as your anchor object, something with weight and intention behind its craftsmanship. For readers building out a fuller kit, Kejiwa’s meditation kit essentials guide and aromatherapy in ritual guide go deeper into pairing scent with specific intentions. Whatever you choose, read labels for allergens and keep any mist away from open flame while it dries.
How Do You Adapt Altar Setup Across Different Spiritual Paths?
The four item minimum works as scaffolding, not a rulebook, and every tradition builds on it differently. Devotional Christian practice offers a clear example: Catholic home altars typically center on a crucifix, flanked by candles, holy water, a rosary, and a Bible, with prayer following a set daily rhythm rather than an open ended intention. That structure gives beginners in devotional traditions a template most secular guides will not.
Ancestor veneration practices, common across many cultures, replace the abstract “anchor object” with actual photographs, and often add a small dish for food or drink offerings that gets refreshed regularly rather than left standing. Witchcraft and pagan practices frequently lean into the four elements framework directly, assigning a full quadrant of the altar to each element and adding tools like a wand, athame, or pentacle as practice deepens. Buddhist household shrines often simplify further, sometimes to a single candle, an incense holder, and a small figure, with the emphasis on repetition of practice over accumulation of objects.
None of these paths is more legitimate than a secular, intention-only altar built from a stone and a candle. What changes between traditions is symbolism and vocabulary. What stays constant is the underlying structure: a clean space, a clear purpose, and objects chosen because they mean something, not because they filled an empty corner. If you are exploring a specific tradition, look into its ritual types and cultural context before borrowing symbols that carry meaning you have not learned yet.
What Mistakes Do Beginners Actually Make?
Most beginner altars fail the same way: too much, too fast. New practitioners see a beautifully styled altar online and try to recreate it item for item, without asking whether each piece serves their own intention. The result is a shelf full of borrowed aesthetics and no real center.
Inconsistency is the quieter version of the same problem. An elaborate altar visited twice a month teaches you less than a plain one visited every single day. The fix for both issues is the same: pick one intention, commit to the three-minute micro-ritual, and resist adding objects until you have lived with what you already have for at least a week. Curation beats accumulation almost every time.
Your altar should look like you, not like a photograph you saved. Copy the structure if it helps. Skip the styling if it does not serve your purpose.
— Kejiwa
Want a Curated Starting Point Instead of Building One From Scratch?
Building an altar from household objects works fine, and plenty of practitioners never need more than a candle and a stone. But if you want objects with intention already built into their craftsmanship, Small batch approaches can give you a shortcut without skipping the personalization step.
The Ormus minerals collection works well as an anchor object, something substantial to sit at your altar’s center. For a cleanser or ambient scent, the botanical aromatics line offers mists made from wild harvested plants rather than synthetic fragrance. And if your intention leans toward inner work over outer ritual, the spagyric herbal tincture collection pairs a daily practice with a plant-based support you actually take, not just place on a shelf. Read each product page for full ingredient lists before buying, especially if you have plant sensitivities. Start with one piece, live with it for a week, and see how it settles into your space.
Where Can You Learn More About Setting Up an Altar?
A few sources cover altar setup with genuinely practical detail, beyond aesthetic inspiration alone.
- Wild Raven’s Nest’s beginner altar guide covers the four-item minimalist starter approach in depth.
- Panaprium’s altar setup guide breaks down daily micro-ritual habits and candle safety.
- Thalira’s sacred space guide explains the four elements framework and smoke-free cleansing.
- Catholically’s home altar guide offers a faith-specific devotional example with daily rhythm.
Sources
- The Beginner’s Guide to Creating an Altar at Home – Wild Raven’s Nest
- How to Set Up Your First Altar: A Complete Beginner’s Guide – Panaprium
- How to Create a Home Altar: Sacred Space Guide 2026 – Thalira
- How to set up a Catholic home altar: a step-by-step guide – Catholically